Kaggle Account & Setup
5. Kaggle Account & Cloud Access Setup
EarPurifier's Cloud Engine relies on free cloud computing instances provided by Kaggle (a subsidiary of Google). Follow these steps to prepare your account:
Step 5.1: Create an Account & Note Your Username
- Visit the platform: kaggle.com.
- Click Register in the top right corner and sign up with your Google account or email.
- Once logged in, click your profile icon in the top right corner to open your profile.
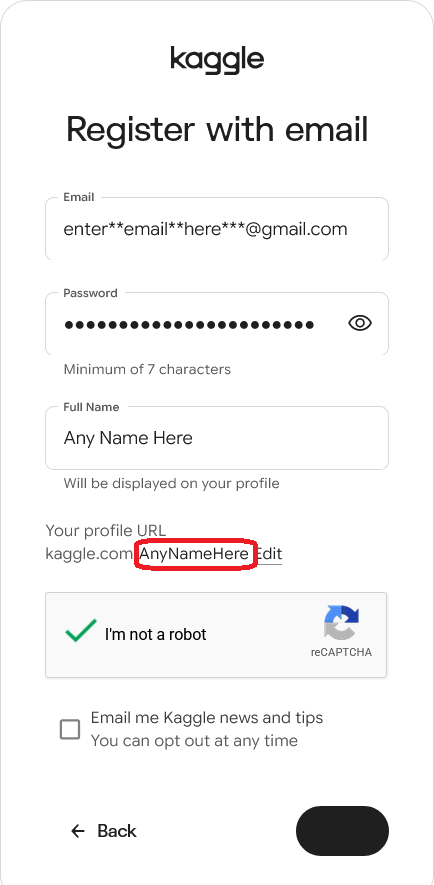
Crucial Note: Your Kaggle Username
The username required by EarPurifier is the unique handle displayed next to your profile URL: kaggle.com/your_username (without kaggle.com/ and without spaces, as highlighted in the red box in the screenshot above), not your Full Name.
- Tip: Copy and save this username in a text note right now, as you will paste it into EarPurifier in a next step.
Step 5.2: Phone Verification (Unlocking Fast GPU Access)
Kaggle provides standard processors to all accounts, but requires a one-time SMS verification to activate fast cloud graphics cards (GPUs).
Important Note on Phone Verification
- Verified accounts: Receive 30 hours of free weekly GPU quota, unlocking top-tier models (RoFormer and MDX23C) at maximum speed.
- Unverified accounts: You can still use Cloud Mode! Simply select the Kim Vocal 2 model; it runs smoothly on Kaggle's free CPU instances without needing a phone number. However, avoid running RoFormer or MDX23C on an unverified account, as the task will stall or fail.
How to verify your phone (free and takes 1 minute):
- Go directly to your Kaggle Account Settings at: kaggle.com/settings.
- Scroll down to the Phone verification section.
- Enter your mobile phone number with your country code and click Send verification code.
- Enter the SMS verification code received on your phone. Once confirmed, cloud GPUs are activated immediately on your account!
- Note: Sometimes, Kaggle might require an additional verification step using your photo ID. WE do NOT recommend you to do that. If you faced this issue, please contact our support account.
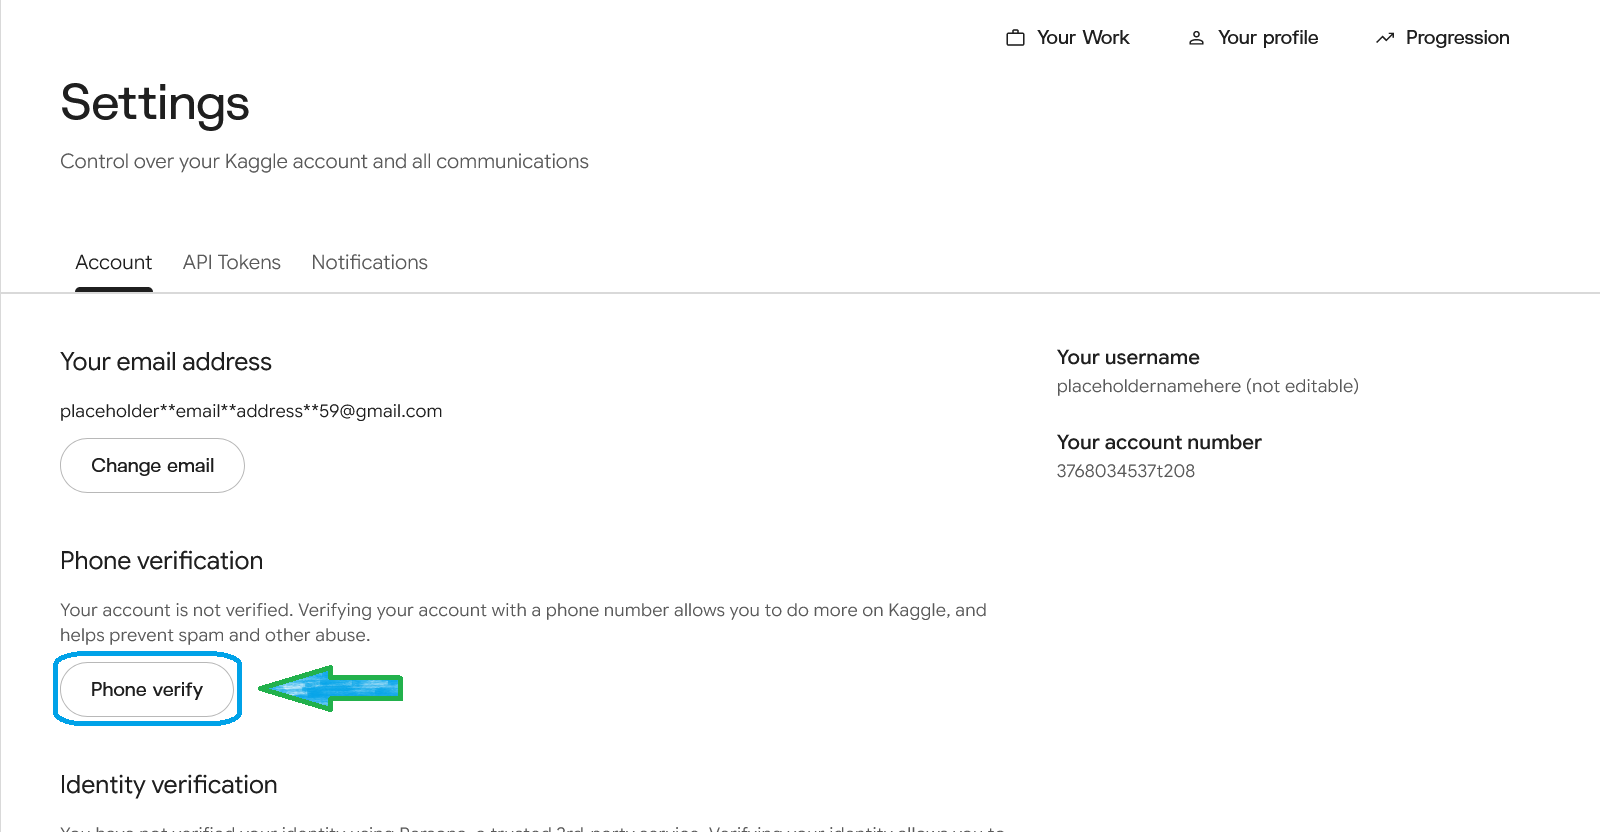
Step 5.3: Generate and Copy Your API Token
EarPurifier uses an API Token to connect securely to your account:
- Go directly to Kaggle's API section at: kaggle.com/settings/api.
- Click the Generate New Token button.
- A modal window will appear on screen displaying your private token alongside a Copy button. Click Copy to copy the token directly to your clipboard, as shown in the video below:
If you ever need to verify your username at this step
You can also download kaggle.json by choosing that option. Opening it in Notepad reveals:
"username": Your exact Kaggle username."key": Your API token key.
You now have your Username and API Token! The next step is entering them into EarPurifier.
Next: Connecting to EarPurifier.