The Cloud Journey
7. The Complete Cloud Processing Journey
In this walkthrough, we will follow the step-by-step experience of purifying a video (or audio) file from initial addition to your finished output:
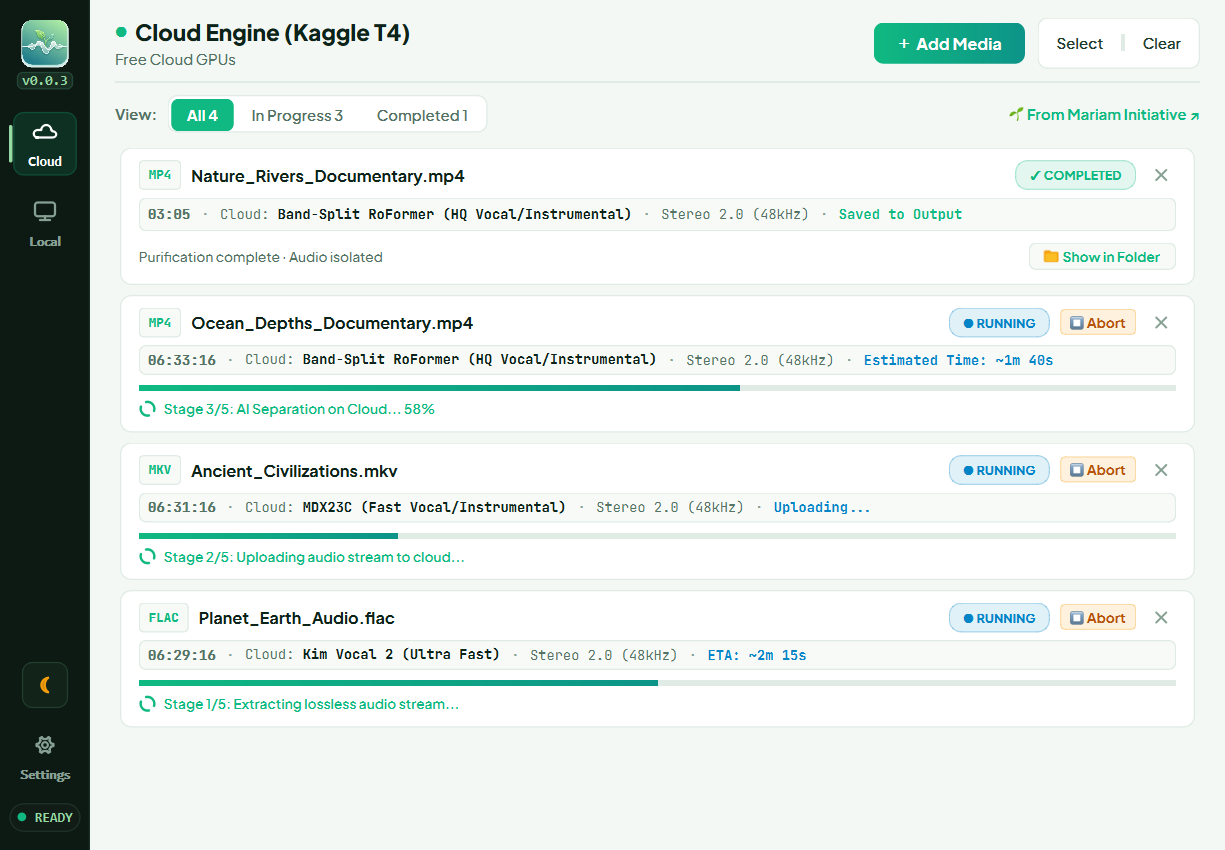
Step 7.1: Add Your Media File
- Make sure the Cloud section is selected in the navigation rail.
- Click + Add Media at the top of the queue, or simply drag and drop files onto the window.
- You can add a single file or queue multiple files together.
Step 7.2: Select Audio Track (For Multi-Track Videos)
If your video contains multiple audio tracks (such as alternating language dubs or commentary tracks), EarPurifier detects this and surfaces the Audio Track Selection Dialog:
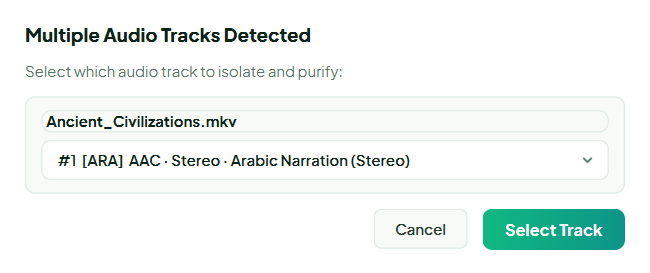
- Select the targeted audio track you want to purify (e.g.
[ARA] AAC · Stereo · Arabic Narration). - Click Select Tracks & Proceed.
Step 7.3: Understanding the Processing Stages
Once added, processing begins automatically. The card on your screen keeps you informed at each step:
- Extracting Audio: EarPurifier reads your file and extracts the audio stream losslessly, leaving your original video file untouched.
- Uploading Audio: Only the extracted audio is uploaded to the cloud (conserving your internet bandwidth).
-
AI Separation: Remote AI models isolate the vocals from background music. The card shows a smooth progress bar and an estimated countdown of remaining time:

-
Downloading Audio: Once separation completes, the purified speech track downloads automatically to your computer.
- Remuxing Video: The application places the clean audio back into your original video, ensuring perfect sync, untouched picture clarity, and intact subtitles.
-
Purification Complete: The card turns green with the status "Purification complete · Music isolated successfully":

Step 7.4: Viewing Your Finished File
- Click Show in Folder on the completed card.
- EarPurifier opens the output folder highlighting your newly generated file (with
_purifiedadded to its name). - Play the file: speech is crystal clear without background music, the video retains 100% of its original resolution, and all subtitles (if present) display seamlessly!